How to Prepare Corn Syrup Like a Pro – Easy Homemade Method for Perfect Results

Learn how to prepare corn syrup at home with simple ingredients. Follow expert steps for smooth, golden syrup perfect for baking, candies, and desserts.
Corn syrup is a staple in both home and commercial kitchens, loved for its ability to add sweetness, shine, and smoothness to recipes. Whether you’re making candies, frostings, or baked goods, understanding how to prepare corn syrup properly is an essential skill. Unlike refined sugar, corn syrup prevents crystallization and ensures a consistent texture — making it the secret behind those perfectly chewy caramels and glossy sauces.
Homemade corn syrup is surprisingly easy to prepare using basic pantry ingredients. This guide walks you through everything you need to know — from the science behind it to practical steps, storage, and creative uses — so you can make your own corn syrup confidently at home.
Understanding What Corn Syrup Really Is
Before learning how to prepare corn syrup, it’s important to know what it actually is. Corn syrup is a liquid sweetener derived from the starch of corn. When corn starch is broken down by enzymes or acids, it converts into glucose, which gives corn syrup its mild, sweet flavor and thick texture.
The result is a versatile syrup that adds sweetness without overpowering other flavors. Commercial corn syrup is refined and stabilized, but the homemade version works beautifully in recipes where you just need that smooth sweetness. It’s a perfect substitute when you want to avoid store-bought processed syrups.
Another advantage of corn syrup is its moisture-retaining quality. It keeps baked goods soft for longer periods and adds that delightful chewiness to candies and marshmallows. This is why bakers, confectioners, and home cooks keep it stocked year-round.
Ingredients You’ll Need to Prepare Corn Syrup
The best part about preparing corn syrup is that you probably already have all the ingredients. The homemade process doesn’t require any special tools or chemicals — just basic kitchen staples.
| Ingredient | Purpose |
|---|---|
| Granulated Sugar | Provides sweetness and body |
| Water | Base for dissolving and cooking the syrup |
| Cream of Tartar or Lemon Juice | Helps prevent crystallization |
| Salt | Balances flavor |
| A pinch of patience | Ensures smooth, even cooking |
You can also experiment with slight variations. For example, some people prefer to use baking soda or vinegar instead of cream of tartar. Each provides a slightly different acidity level but achieves the same goal — preventing sugar crystals from forming as the syrup thickens.
Step-by-Step Guide on How to Prepare Corn Syrup
Learning how to prepare corn syrup is as much about patience as precision. The process involves heating sugar and water until the mixture reaches the right consistency without burning or crystallizing.
Step One – Combine Ingredients:
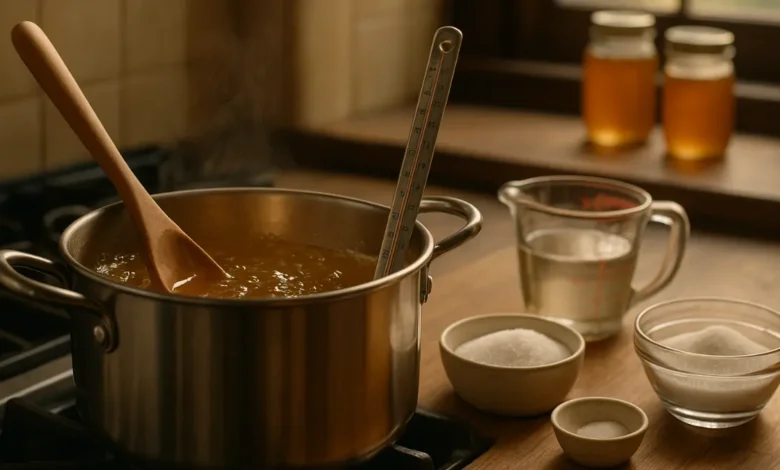
Start by adding sugar, water, cream of tartar (or lemon juice), and salt to a heavy-bottomed saucepan. Stir gently to dissolve the sugar before heating.
Step Two – Heat Gradually:
Place the pan over medium heat. Stir occasionally until the sugar completely dissolves, then stop stirring once the mixture begins to simmer. This prevents unwanted crystals from forming.
Step Three – Simmer and Monitor:
Allow the mixture to simmer gently. The goal is to evaporate water while maintaining smooth texture. Depending on your stove, this can take anywhere from 20 to 40 minutes.
Step Four – Test Consistency:
Dip a spoon into the syrup and let it cool slightly. When it coats the spoon in a thin, glossy layer, it’s ready. If you prefer a thicker syrup, continue simmering a bit longer, but don’t let it caramelize.
Step Five – Cool and Store:
Once done, remove the pan from heat and allow it to cool completely before transferring it into a clean glass jar. Store it at room temperature or refrigerate for longer shelf life.
Why Homemade Corn Syrup Is Worth It
Homemade corn syrup offers several advantages over the store-bought version. It’s fresher, preservative-free, and customizable. You can adjust sweetness or thickness according to your recipe.
Beyond that, preparing corn syrup yourself teaches you the chemistry behind cooking. It gives you insight into why sugar behaves differently under heat and how moisture affects texture. This knowledge helps you become a better baker and candy-maker overall.
Another key benefit is cost. A small bottle of commercial syrup can be pricey, while homemade versions cost only a fraction to make. It’s efficient, practical, and rewarding.
“Cooking is science you can eat — and homemade corn syrup is one of the simplest experiments with the sweetest rewards.”
Common Mistakes When Preparing Corn Syrup
Even experts can face issues when learning how to prepare corn syrup, especially with temperature control and crystallization.
One common mistake is over-stirring the mixture after it starts to boil. Stirring at this stage introduces air and promotes crystal formation, making your syrup grainy instead of smooth.
Another problem arises when using high heat. Sugar burns quickly, and burnt sugar ruins both flavor and color. Always simmer gently and be patient. Using a candy thermometer can help, but trust your eyes and texture too.
Finally, make sure your utensils and pots are clean. Even tiny impurities can encourage unwanted crystals. A small brush dipped in warm water helps wash down sugar granules from the sides of your pan as you cook.
Variations of Homemade Corn Syrup
Once you master how to prepare corn syrup, you can experiment with flavor and texture. Some people prefer adding a hint of vanilla or a drop of maple extract for a deeper aroma. Others mix in honey for a richer taste and extra viscosity.
If you want a darker syrup, cook it a bit longer until it reaches a light amber tone. This version works wonderfully in caramel sauces or pecan pies. On the other hand, lighter syrups are perfect for frostings, glazes, and candies.
You can also create a brown-sugar variation by replacing some white sugar with brown sugar. This gives your syrup a subtle molasses undertone, perfect for gingerbread or toffee recipes.
Uses of Corn Syrup in Everyday Cooking
Corn syrup plays multiple roles in cooking. It’s not just a sweetener but also a stabilizer and texture enhancer. When you prepare corn syrup at home, you open up countless culinary possibilities.
It’s essential in making chewy candies, soft caramels, marshmallows, and nougat. In baking, it keeps cookies soft and moist while giving frostings a glossy finish. In beverages, it adds body without changing the flavor profile drastically.
You can also use corn syrup to create smooth glazes for meats, fruit tarts, and even homemade granola bars. Because it prevents crystallization, it’s ideal for creating perfect ice creams and sorbets with a silky mouthfeel.
Comparing Corn Syrup with Other Sweeteners
| Sweetener | Texture | Flavor | Best Use |
|---|---|---|---|
| Corn Syrup | Smooth, thick | Mild sweetness | Candies, glazes, baking |
| Honey | Sticky, dense | Floral, strong | Sauces, marinades |
| Maple Syrup | Runny | Earthy, aromatic | Pancakes, desserts |
| Sugar Syrup | Thin | Neutral | Drinks, frostings |
While honey and maple syrup have distinct flavors, corn syrup offers neutrality. This is why professionals prefer it in recipes where you don’t want the sweetener to overpower the main taste.
Storing Homemade Corn Syrup
Proper storage is key to maintaining freshness and consistency. Always use an airtight glass container to store your prepared syrup. Plastic containers can sometimes alter the flavor or allow air leakage.
Keep your corn syrup at room temperature in a cool, dry place. If your kitchen is warm, refrigeration is recommended. The syrup thickens slightly when chilled, so let it return to room temperature before using.
Homemade corn syrup can last up to a few months if stored correctly. Just make sure no moisture or contaminants get inside the jar.
Expert Tips for Perfect Corn Syrup Every Time
- Always start with clean utensils to prevent crystallization.
- Use a heavy-bottomed saucepan to distribute heat evenly.
- Don’t rush — patience ensures a smooth texture.
- Add a few drops of lemon juice or cream of tartar for stability.
- Avoid stirring once the mixture starts to boil.
Following these small details makes a big difference in your final result. Over time, you’ll develop the instinct to recognize the right consistency by sight and texture alone.
Frequently Asked Questions
Q1: Can I use vinegar instead of cream of tartar when preparing corn syrup?
Yes, vinegar can replace cream of tartar. Both act as acidifiers to prevent crystallization. Just use about half a teaspoon of white vinegar per cup of sugar.
Q2: How long does homemade corn syrup last?
When stored properly in an airtight container, it can last for up to two months at room temperature or three months when refrigerated.
Q3: Is homemade corn syrup healthier than store-bought?
While both are similar in calories, homemade versions avoid commercial additives and preservatives, making them a cleaner choice.
Q4: Can I use homemade corn syrup for candy making?
Absolutely. It’s perfect for caramel, fudge, and other confections since it prevents crystallization and adds that ideal chewiness.
Q5: Why did my corn syrup crystallize?
Crystallization happens if the mixture is stirred after boiling or if undissolved sugar sticks to the pan’s sides. Clean tools and proper technique prevent this.
Conclusion
Learning how to prepare corn syrup empowers you to take control of your ingredients and elevate your cooking. It’s an easy, rewarding process that teaches the fundamentals of sugar chemistry while giving you a useful homemade sweetener for countless recipes.
With just a few pantry ingredients and a little patience, you can create smooth, golden syrup that rivals any store-bought brand. Whether for candy, baking, or glazing, homemade corn syrup is a true kitchen essential for any home chef who values both quality and flavor.
